Water damage can be a serious issue in your home, especially when it affects baseboards. If you've noticed signs of water damage, such as discoloration, peeling paint, or swelling, it's important to take action quickly. Fixing water-damaged baseboards is essential to prevent further damage and maintain your home’s appearance.
To restore your baseboards, you will need to identify the source of the water damage first. Whether it's a leak or high humidity, addressing the root cause is key. Once that's resolved, you can clean, repair, or replace the affected baseboards, depending on the extent of the damage.
Knowing how to fix water-damaged baseboards can save you time and money. With the right tools and steps, you can protect your home from further issues and keep it looking its best. Let's explore how to tackle this problem effectively.
Identifying Water Damage
To fix water-damaged baseboards, you first need to identify the damage. This involves looking for specific signs and understanding potential structural issues.
Visual Inspection
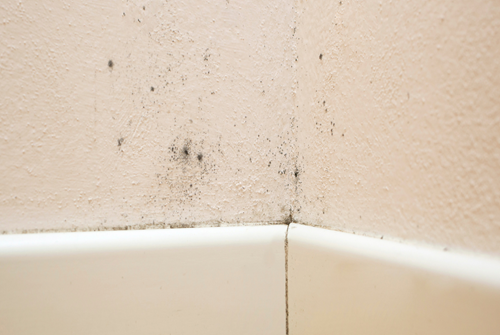
Start by examining your baseboards closely. Look for signs of water damage such as discoloration or staining. These are often the first indicators. You may also see swelling or buckling, which suggests that the wood has absorbed moisture.
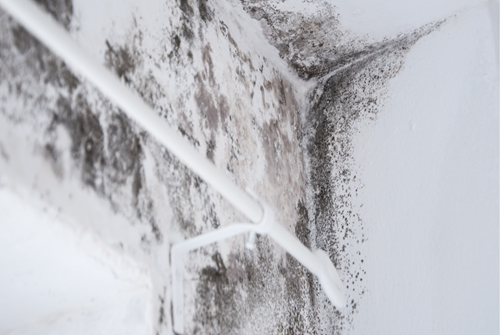
Check for peeling paint or wallpaper. This can happen because water trapped behind the surface causes it to loosen. Take note of mold growth in the area. Mold thrives in moist conditions and can pose health risks.
Also, inspect the area around your baseboards for water spots on the wall. This can signal a problem from a plumbing leak or leaky roof. High humidity can also contribute to damage, so don’t overlook that possibility.
Structural Concerns
After your visual inspection, assess the structure of your baseboards and nearby areas. Look for softness in the wood. If it feels spongy, replacing it might be necessary. This may indicate serious water damage that has compromised the baseboard's integrity.
Consider the source of the moisture. Identify if it's due to a leaky pipe or condensation issues. These sources can lead to ongoing problems if not addressed. High humidity in your home can also contribute to mold and structural issues.
Finally, check if the water damage has spread to adjacent areas. Damage can weaken nearby structures. Ignoring these signs can lead to more extensive repair work in the future.
Preparing for Baseboard Repair
Before starting to fix water-damaged baseboards, it is crucial to get ready properly. This includes removing the damaged baseboards, checking the condition of the drywall, and ensuring you prevent any further damage.
Removing Water-Damaged Baseboards
Begin by using a pry bar to gently pull away the damaged baseboard. Place a piece of scrap wood under the pry bar to protect the wall. With some force, lift the board away from the wall. Next, use a hammer to tap any stubborn areas.
After removing the baseboard, check for any nails left in the wall or in the baseboard itself. You may need a saw to cut the baseboard if it doesn't come loose easily. Dispose of the damaged board properly.
Make sure to clean up any debris from the area to avoid safety hazards.
Assessing Drywall Condition
Once the baseboard is removed, examine the drywall for signs of water damage. Look for staining, peeling paint, or mold. These signs mean moisture has affected the drywall.
If the drywall feels soft or crumbly, it likely needs to be replaced. Use a utility knife to cut away the damaged section. If mold is present, it is best to contact a professional for mold remediation.
Keep in mind that damaged drywall can prevent a proper seal once you replace the baseboard.
Preventing Further Damage
To stop future water damage, identify any sources of leaks. Check plumbing, windows, and roof areas for possible issues. Make any necessary plumbing repairs promptly.
To help prevent moisture damage, consider applying a waterproof seal to the new baseboards and drywall. Also, use a dehumidifier in areas prone to moisture.
You should inform your homeowners insurance provider about the damage. They may offer guidance or assistance with repairs. Taking these precautions will help you avoid similar problems in the future.
Repairing Water-Damaged Baseboards
Water damage can harm your baseboards, especially if they are made from MDF. You have options for repairing or replacing them. Here are some key techniques to fix or replace water-damaged baseboards effectively.
Repair Techniques for MDF Baseboards
To repair MDF baseboards, check for warping or soft spots. If the damage is minor, you can use a putty knife to apply wood filler to any damaged areas. Make sure to sand it smooth once it’s dry.
If the baseboard is warped, you might need to use a drill with screws. This helps pull the baseboard back into shape. Once you fix the warping, apply caulk along the seams between the baseboard and the wall to prevent future water damage.
After the repairs, consider painting or staining the baseboards to give them a fresh look.
Cutting and Installing New Baseboards
When the damage is too severe, you may need to cut and install new baseboards. Use a miter box and saw to cut the new boards to the right length. Always measure twice to avoid mistakes.
To attach the new baseboards, use a hammer and finish nails or screws for a secure fit. Make sure the baseboard sits flush against the wall. If you need to add shoe molding or base shoe molding, cut it to size and attach it with a nail gun for a clean finish.
Use caulk to seal any gaps between the baseboard and the wall, ensuring a neat appearance.
Sealing and Finishing
After installing, sealing your baseboards is crucial. Use a quality sealant to protect against moisture. This step is especially important in areas prone to water exposure.
Once your baseboards are sealed, you may want to stain or paint them for aesthetic reasons. Choose a paint or stain that matches your room decor. Apply at least two coats for a durable finish.
Regular maintenance, like checking for signs of water damage, will help prolong the lifespan of your baseboards.
Final Touches and Maintenance
After you have repaired the water-damaged baseboard, it’s important to complete the project with final coats and establish a routine for monitoring your baseboards. These steps will help prevent any future damage and keep your home looking its best.
Applying Final Coats
To protect your newly restored baseboard, you should apply appropriate finishing coats. A good sealant can help prevent water damage from occurring again. Choose a water-resistant sealant that suits your baseboard material, whether it’s wood or composite.
- Start by sanding the surface lightly for a smooth finish.
- Clean the area to remove dust and debris.
- Use a brush or roller to apply the sealant evenly.
If you want a specific color, consider staining the baseboard before sealing. This not only enhances the look but also adds an extra layer of protection. Give the sealant ample time to dry according to the manufacturer’s instructions.
Regular Monitoring
After your baseboard is restored, make a habit of checking it regularly. Look for signs of moisture or damage, especially in high humidity areas.
- Inspect the baseboards every few months for discoloration or swelling.
- Pay attention to changes in the surrounding environment, like leaks or condensation.
Addressing any issues quickly can prevent more extensive water damage later. If you find persistent problems, you might want to consult a professional. Preventing water damage can save you time and expenses in the long run.
Contact Keystone Restoration for water damage restoration services. Our experts have the tools and experience to handle significant water damage. Reach out to us by calling (814) 533-5989 or filling out our online form.