Water damage to drywall is a common problem that can compromise the structural integrity of your walls and lead to costly repairs if not addressed promptly. Repairing water-damaged drywall involves assessing the extent of the damage and checking for mold growth before starting any repairs. This step is crucial as mold can pose health risks and further weaken the structure.
Once you've identified the affected areas, you'll need to cut out and replace any sections that are too damaged to salvage. Make sure to dry the area thoroughly before installing new drywall to prevent future issues. Use appropriate tools and materials to ensure a seamless repair that blends with the rest of your wall.
Keep an eye out for signs of deeper problems, such as persistent moisture or leaks that caused the damage originally. Addressing the root cause is essential to ensure your repair work lasts and keeps your home safe from further water damage. Taking these steps can save you time, effort, and money in the long run.
Assessing the Damage
To effectively repair water-damaged drywall, it's essential to first understand the root cause and extent of the damage. This involves identifying the source of the water, evaluating the degree of damage, and checking for mold and structural issues.
Identify the Source of Water
Determining where the water originated is crucial. Common sources include leaks from roofs, plumbing, or nearby windows. Use a moisture meter to trace back the wettest areas to find the origin. If the leak isn't apparent, consider consulting a professional.
Persistent leaks need immediate attention. Roof leaks can be elusive and might require a thorough inspection. Similarly, plumbing issues could involve hidden pipes. Addressing the source helps prevent future damage.
Evaluate the Extent of Damage
Assess the degree of damage by inspecting both visible and hidden areas. Water-damaged drywall often shows discoloration, bubbling, or peeling. Soft spots or sagging indicate severe saturation.
Probe gently with a screwdriver to check for softness. Large areas of damage might need full replacement of the drywall panel, while minor damage could be repaired. Use the moisture meter to measure the moisture content and outline the affected area.
Checking for Mold and Structural Issues
Mold growth is a significant concern with water damage. Keep an eye out for black, green, or white spots, as they are usual signs of mold. It can affect the air you breathe and your health, so it's important to deal with it quickly.
Check the structural integrity by examining supporting beams and studs for water damage. Warping or weakening of these elements indicates structural damage. Professional assessment may be necessary if significant issues are found. Repair or replace compromised materials to ensure safety and stability.
Preparing for Repairs
Before you start fixing water-damaged drywall, you need to remove the damaged sections and dry out the area completely. Additionally, gathering the right tools and materials will ensure your repair process goes smoothly.
Removing Damaged Drywall
Put on safety goggles to protect your eyes. Use a utility knife to cut out the water-damaged drywall, extending the cut at least six inches beyond the visible damage to ensure you remove all weakened material. Check for any signs of mold and remove all compromised sections. Be careful not to cut through any electrical wiring or plumbing behind the wall.
When removing the damaged drywall, look for sections that crumble easily. Mark areas that are soft or discolored, as these are likely affected by water. Continue to cut in manageable sections, making it easier to handle and dispose of the debris.
Drying Out the Affected Area
Once the drywall is removed, the next step is to dry the affected area. Use a fan and a dehumidifier to thoroughly dry the space. It can take several hours to days, depending on the amount of water and humidity in the room. Proper drying prevents mold growth and further damage.
Keep the fan running continuously and periodically check the moisture levels. If the insulation behind the drywall is wet, it’s best to replace it to prevent mold. Ensure the wooden studs are dry before proceeding with the repairs.
Gathering Necessary Materials and Tools
Collect all the materials and tools you need before starting the repair to avoid interruptions. Essential items include a utility knife, new drywall sheets, joint compound, drywall tape, and a sanding block. Make sure you have the right measurements for the new drywall panels to fit perfectly.
Other necessary tools might include a tape measure, drywall screws, a screwdriver, and safety goggles. Having everything on hand will make the repair process more efficient and less frustrating.
Repairing the Drywall
When repairing water-damaged drywall, it's essential to replace the affected area, apply appropriate compounds, and prepare the surface for painting. Follow these steps to ensure a clean and smooth finish.
Installing New Drywall
Remove the damaged drywall using a utility knife or a drywall saw. Cut a new piece of drywall to fit the hole and attach it using drywall screws. Ensure the screws are slightly recessed. Use a drywall patch for smaller holes.
To secure the new piece, position it and drive screws through the drywall into the studs behind it. Make sure the patch is level with the surrounding drywall. Inspect the edges to ensure there are no gaps.
Taping and Applying Joint Compound
Apply drywall tape over the seams where the new and old drywall meet. Use a taping knife to smooth it out. Then, apply a thin layer of joint compound over the tape and the edges of the patch.
Ensure the compound is smooth. Let it dry thoroughly, usually for around 24 hours. Apply a second coat if necessary, ensuring each layer is thin and smooth. Use the knife to feather the edges, blending the compound into the existing drywall.
Sanding and Priming the Surface
Once the joint compound is completely dry, sand the surface with sandpaper to create a smooth, even finish. Use fine-grit sandpaper for the best results, being careful not to damage the surrounding drywall.
After sanding, wipe away dust and apply a coat of primer over the repaired area. This helps seal the joint compound and prepares the surface for painting. Once the primer dries, you can proceed with painting to match the rest of the wall.
Finishing Touches and Prevention
For a smooth finish, apply paint and match texture precisely, ensuring an even surface. To prevent future water damage, address common causes like leaky roofs and plumbing leaks. Proper steps can help protect your home.
Applying Paint and Texture Matching
1. Prime and Paint: Start by applying a water-based primer to the repaired drywall. This seals the surface and prepares it for painting. Once the primer dries, use a suitable paint color that blends with the existing wall.
2. Texture Matching: If your wall has a specific texture, replicate it. Use tools like textured rollers, sponges, or spray cans to achieve a close match. Practice on a spare piece of drywall if needed to get the texture right.
3. Blending: Feather the paint edges with a brush to blend the new paint into the old. This avoids noticeable lines and ensures a seamless look.
Water Damage Prevention Tips
1. Inspect for Leaks: Regularly check for leaky roofs and plumbing leaks. Repair any issues immediately to avoid extensive drywall damage.
2. Maintain Gutters: Clean and maintain gutters and downspouts. This prevents water from pooling near your home's foundation, which can lead to interior leaks.
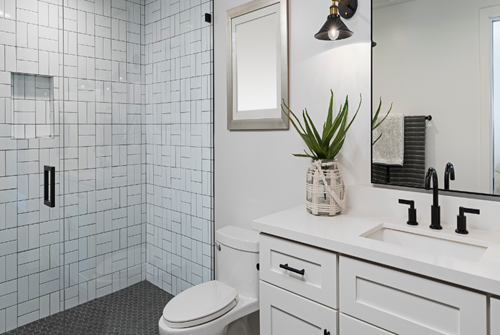
3. Proper Ventilation: Ensure rooms, especially bathrooms and kitchens, are well-ventilated. Use exhaust fans to reduce humidity levels, preventing moisture buildup.
4. Waterproofing: Consider applying waterproofing solutions to areas prone to dampness. This adds an extra layer of protection against water intrusion.
5. Regular Maintenance: Conduct routine maintenance and inspections to identify and fix potential water damage sources. Timely action can prevent extensive repairs in the future.
Fixing drywall with minor water damage is a manageable task that most homeowners can handle with some research and patience. However, it's crucial to recognize when water damage is severe and beyond a DIY fix, so you know when to call in a professional. Contact us at Keystone State Restoration for all your plumbing repair and restoration needs.