Dealing with a water damaged wood floor can be challenging, but addressing it promptly will save you from more extensive repairs. Assess the extent of the water damage by looking for signs like discoloration, warping, and musty smells. Immediate steps include removing any surface water and thoroughly drying the floor to prevent further damage.
If the damage is minor, sanding and refinishing might restore your floor to its original state. Stubborn stains or buckled wood may require replacing the affected planks. Consider consulting a professional for more severe damage to ensure the best results.
Identifying Water Damage
Water damage in wood floors can be identified through distinct signs and specific assessment methods. Recognizing these signs early can prevent more severe issues and ensure effective remediation.
Assessing the Extent of Damage
Start by inspecting the affected area for discoloration and warping. Damaged wood often shows dark spots or a change in color. You may also notice that the boards feel soft or spongy when pressed.
Additionally, keep an eye out for any standing water or dampness on the surface. This can indicate a potential ongoing problem. Carefully check the subfloor, as water can seep below the surface and cause further issues.
Using a moisture meter can provide a precise reading of the water content in the wood.
Signs of Mold and Mildew Growth
Mold and mildew often appear as black, green, or gray patches on or between the boards. These fungi thrive in damp conditions and can spread quickly if not addressed. The presence of a musty odor is another clear indicator of mold growth.
Inspect hidden areas like under rugs, behind baseboards, and in corners, as mold can grow unnoticed in these spots. Mildew typically forms on the surface and can be wiped away, but mold may require professional remediation.
Differentiating Cupping and Crowning
Cupping and crowning are common types of water damage in wood floors. Cupping occurs when the edges of the wood planks are higher than the center, creating a concave shape. This happens when moisture seeps into the wood from below.
Crowning, on the other hand, is when the center of the planks rises higher than the edges, resulting in a convex shape. This typically occurs due to moisture from above, often from spills or high humidity levels.
Understanding the difference between these two can help in determining the source of the moisture and selecting the appropriate repair method.
Determining the Source of Water Damage
Identifying the source of water damage is critical for effective repair and prevention. Key areas to examine include leaks, infiltration points, and common causes such as burst pipes or appliance malfunctions.
Locating Leaks and Infiltration Points
To locate leaks and infiltration points, begin by inspecting areas prone to water entry. Check around windows, doors, and the roof for any signs of water penetration. Utilize a moisture meter to detect hidden leaks in walls and flooring.
If you suspect a hidden leak, look for stains or discoloration on ceilings and walls as these can indicate water seepage. Look under sinks and behind appliances like dishwashers and washing machines for pooling water. Inspect the basement and crawlspaces, as these areas often show signs of water infiltration first.
Understanding Common Causes
Several common causes can lead to water damage in wood flooring. Burst pipes are a primary culprit, often resulting from aging plumbing or freezing temperatures. It’s essential to regularly inspect and maintain your home's plumbing system to prevent such issues.
Appliance malfunctions, such as dishwasher leaks, can also cause significant water damage. Ensure your appliances are properly installed and maintained to minimize risk. Flooding from severe weather or poor drainage can infiltrate your home and damage wood floors. Improve grading around your home and maintain clean gutters to divert water away from your foundation.
Preparing for Repair
Appropriate preparation is critical when repairing water-damaged wood floors. Key steps include effectively removing surface water and ensuring the area is thoroughly cleaned and disinfected.
Removing Surface Water and Drying the Area
First, remove any standing water using a shop vacuum or squeegee. Acting quickly reduces further damage.
Fans and dehumidifiers are essential tools for drying the area. Place fans around the room and use dehumidifiers to draw moisture from the air. This creates proper ventilation and accelerates drying.
After initial water removal, monitor the moisture content of the wood with a moisture meter. Aim to reach moisture levels suitable for your specific wood type (usually around 6-9%).
Cleaning and Disinfecting the Damaged Surface
Once the area is dry, begin cleaning the wood surface. Using clean water and a mild detergent, scrub the affected areas thoroughly to remove any dirt or lingering contaminants.
Apply a suitable disinfectant to eliminate bacteria and mold spores. This is critical to prevent any long-term issues, such as mold growth or structural weakening of the wood.
Allow the disinfected area to dry completely. Use fans and dehumidifiers to speed up the drying process. Recheck the moisture content to ensure it remains at safe levels.
Mold Treatment and Prevention
Effectively addressing mold and mildew growth on water-damaged wood floors involves safe removal techniques and considering professional services to ensure thorough treatment and long-term prevention.
Safe Removal of Mold
When dealing with mold on wood floors, begin by ensuring the area is well-ventilated. Wear protective gear such as gloves, masks, and goggles to avoid exposure to mold spores.
Start by scrubbing the moldy area with a mixture of water and detergent. For persistent mold, you might need a solution of one cup of bleach in one gallon of water. Avoid using too much water as it can soak into the wood and cause further damage.
Dry the area completely after cleaning. Use fans or dehumidifiers to speed up the drying process. Monitor the treated area regularly to ensure the mold does not return.
Using Professional Mold Treatment Services
For extensive mold infestations, it is advisable to contact professional mold treatment services. Experts like Keystone provide specialized techniques to tackle mold effectively and prevent recurrence.
Professional services start with a comprehensive assessment of the affected area. They use advanced tools and methods to detect hidden mold and treat it thoroughly. Experts may employ industrial-grade cleaners and mold inhibitors to ensure deep and lasting solutions.
Repair Techniques for Water-Damaged Wood Floors
Addressing water damage in wood floors often involves minor repairs, sanding and refinishing, or even replacing severely damaged boards. Effective techniques ensure the restoration of both the appearance and structural integrity of your hardwood floors.
Minor Repairs and Spot Treatments
For small areas of damage, you can use wood putty to fill gaps or cracks. This method helps in fixing minor dents or scratches caused by water. Begin by cleaning the damaged area thoroughly to remove any loose debris.
Next, apply wood putty using a putty knife, ensuring it fills the gaps evenly. Once the putty is dry, sand the area gently to create a smooth surface.
Ensure the repaired spots blend well with the surrounding floor by staining and finishing them. Staining not only matches the color but also adds a layer of protection. Minor warping can be addressed by placing a heavy object over the warped area until it flattens out.
Sanding and Refinishing Techniques
Sanding and refinishing are crucial for restoring the look and feel of your hardwood floors. This process begins by sanding the damaged area to remove the affected layer of wood. Using a drum sander or floor buffer, carefully sand the floor, focusing on the water-damaged sections.
Vacuum the floor thoroughly to remove all dust and debris. Next, apply a stain that matches your existing floor color. Once the stain is dry, apply a layer of polyurethane or appropriate finish to seal and protect the wood.
Repeat the sanding and refinishing process if the warping or damage is extensive. This might involve multiple sanding passes and layers of finish to achieve a perfectly smooth and durable surface.
Replacing Severely Damaged Boards
When the damage is extensive, replacing the affected boards is the best solution. Start by identifying and marking the damaged boards. Using a circular saw, cut the board along the seams and remove it carefully without causing harm to surrounding boards.
Prepare the replacement board by trimming it to the correct size. Apply wood glue to the edges and fit it into the existing space. Secure the board in place with finishing nails, ensuring it sits flush with the existing floor.
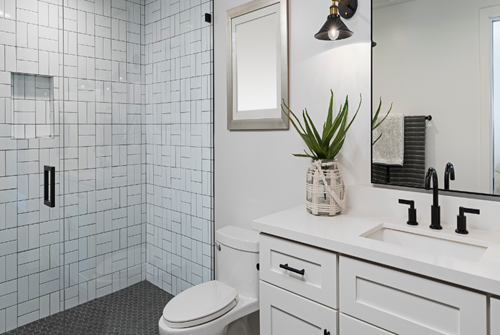
Sand, stain, and refinish the new board to match the rest of your floor, guaranteeing a seamless integration. For a professional touch, consider hiring experts like Keystone, renowned for their top-notch home restoration services in Altoona, Indiana, Johnstown, and State College. Keystone specializes in decking, roofing, painting, bathroom and kitchen remodeling, fire damage, water damage, mold remediation, and cleaning services.
Understanding Subfloors and Structural Repair
Subfloors play a crucial role in maintaining the integrity and longevity of hardwood flooring. Properly checking and repairing subfloors, as well as knowing when to replace a plywood subfloor, are essential steps in addressing water damage.
Checking and Repairing the Subfloor
To begin, remove the hardwood flooring to inspect the subfloor. Look for signs of water damage such as discoloration, warping, or mold. Use a moisture meter to detect hidden moisture. If moisture levels are high, employ fans and dehumidifiers to dry the area thoroughly.
Next, identify any areas where the subfloor feels soft or spongy. These spots indicate rotting or compromised material that needs repair. Mark these areas, then carefully cut out the damaged sections. Replace them with new plywood, ensuring the new pieces fit snugly and are securely fastened.
When to Replace the Plywood Subfloor
In some cases, the damage to your subfloor may be extensive enough to warrant a full replacement. If large areas of the subfloor exhibit severe warping, rotting, or mold, it's best to replace the entire section. This ensures the new hardwood flooring has a stable and even foundation.
Temperature and humidity fluctuations can also compromise the integrity of plywood subfloors. If the subfloor has been compromised by repeated exposure to moisture, it's crucial to replace it to prevent further damage to the new flooring.
Finishing Touches after Repairing Damage
The final steps of repairing water damaged wood floors involve meticulous work to ensure the repaired areas blend seamlessly with the existing flooring. Additionally, reinstalling baseboards and trim is crucial for a polished, professional look.
Restaining and Blending Repaired Areas with Existing Flooring
Once you have repaired and sanded the damaged areas, the next step involves restaining. Choose a stain that matches your hardwood flooring. It's important to test the stain on a small, inconspicuous part of the floor to ensure it matches perfectly. Apply the stain evenly with a brush or cloth, following the wood grain to avoid streaks.
Let the stain dry completely before applying a second coat if needed. After staining, apply a finish coat such as polyurethane for protection. This not only enhances the color but also adds a layer of durability to the wood. Be sure to ventilate the area well during application and drying.
Blending the repaired area with the existing floor is critical for an even appearance. Lightly sand the edges of the new stain to blend it smoothly into the old flooring. This helps to create a uniform look, hiding any visible transitions between the old and new areas.
Reinstallation of Baseboards and Trim
After the floor is repaired and stained, reinstalling baseboards and trim is the final step. Ensure that all dirt and debris are cleaned from the area where the baseboards will be reinstalled. Use a level to ensure the baseboards are straight and secure them with finishing nails.
If the baseboards were damaged, consider replacing them entirely. In some cases, repainting or restaining the baseboards to match the new flooring may be necessary. Apply caulking along the tops of the baseboards to close any gaps between the wall and the trim for a seamless look.
Ongoing Maintenance and Prevention
Proper maintenance and prevention are crucial in keeping your wood floors in excellent condition and avoiding future water damage. Regular care and preventive measures can significantly extend the life of your flooring.
Regular Cleaning and Care for Wood Floors
To maintain the beauty and integrity of your hardwood floors, regular cleaning is essential. Sweep or vacuum your floors daily to remove dust and dirt that can cause scratches. Using a vacuum with a soft brush attachment can help avoid damage.
When mopping, use a damp, not wet, mop with a mild detergent. Excess water can seep into the wood, causing buckling or warping. Ensure you dry the floor immediately using a soft, dry cloth to prevent moisture from penetrating the wood.
Humidity control is also important. Use a dehumidifier during humid months to keep moisture levels stable. Additionally, place mats at entrances to trap moisture and debris before they reach your floors.
Preventing Future Water Damage and Moisture Issues
Prevention is key to protecting your wood floors from water damage. Immediately clean up any spills or leaks to prevent moisture from seeping into the wood. Employing a moisture meter can help you monitor the moisture levels in your flooring, ensuring they remain within safe limits.
Ensure proper airflow throughout your home by using fans and opening windows, which helps in reducing humidity levels. Installing waterproof barriers under sinks and appliances can also add an extra layer of protection against potential leaks.
By incorporating these maintenance tips and preventive measures, you can extend the lifespan of your hardwood floors and protect your investment.
Addressing Water Damage Insurance Claims
Navigating water damage insurance claims involves precise documentation and understanding the process of filing the claim efficiently to ensure you get the coverage you deserve.
Filing a Claim with Insurance Companies
When dealing with water damage to your wood floors, your first step is to notify your insurance company. Contact them as soon as the damage is discovered to start the claims process. Be prepared to provide details about the extent and cause of the damage.
It's important to understand the policy details. Know what types of water damage are covered and confirm the deductible amount. Insurers often require you to fill out specific forms and may ask for an adjuster to inspect the damage.
Documenting Damage and Repair Costs
Thorough documentation is crucial. Take clear, dated photos and videos of all damaged areas. This visual proof is essential for validating your claim. Keep an inventory of all damaged items, including brands, models, and purchase costs, if available.
Maintain all receipts and repair orders. Detailed records of expenses and repairs can significantly aid in justifying the claimed amount to your insurance company. This can help you recover most, if not all, of the costs incurred.
Hiring Professional Help
When dealing with water-damaged wood floors, knowing when to seek professional help and what to ask your chosen experts can ensure that your home receives the best care possible. Professional services can save you time, prevent further damage, and provide superior results.
When to Seek Professional Help for Water Damage Repairs
Hiring professional help is essential when water damage extends beyond surface-level issues. If you notice extensive warping, buckling, or discoloration in large areas, it's critical to bring in experts. Moreover, if the water damage has penetrated deeply into the subflooring or structural elements, professional intervention is necessary.
Ignoring significant water damage can lead to mold growth and additional structural problems. Professionals have the tools and experience to assess hidden moisture and carry out thorough water removal, drying, and restoration.
Questions to Ask Wood Floor Repair Experts
When choosing professional help, it's vital to ask specific questions to ensure you are hiring the right team. Start by inquiring about their experience with wood floor repair and water damage restoration. It's important that they have a proven track record in dealing with similar projects.
Additionally, ask about the specific methods and equipment they will use for repairs. Understanding their approach helps you gauge their expertise and the quality of their work.
Don't forget to inquire about the timeline and cost estimates. Clear communication about these aspects will help you plan your repair project effectively.
Contact us to discuss your options.